Exporting Data from Quicken Essentials and importing into Quicken Windows
(See end of document for notes on importing the resulting QIF file into Quicken Mac 2007)
- From the Accounts menu, choose Hide and Show Account. Make sure all accounts are visible (no check marks). Click OK.
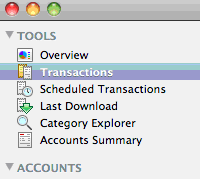
- Click on Transactions in the Source List
- Make sure the Date, Check #. Payee, Category, Tags, Account, Transfer, Amount, Reconcile, and Memo/Notes field are all visible (This is default, order does not matter):
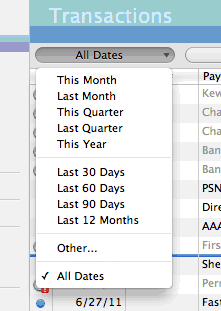
- Change the date filter in the top banner of the register to show All Dates
- Warning! In Quicken Windows 2015 (other versions of Quicken Windows are fine) there is a memory leak problem with the QIF import, and you can only Accept (from the Downloaded Transactions tab) a few hundred transactions before it either hangs or crashes. So you might want to create multiple CSV files using different date ranges, and follow the procedure for each of these files.
- From the File menu, choose Export: Export Transactions to CSV File
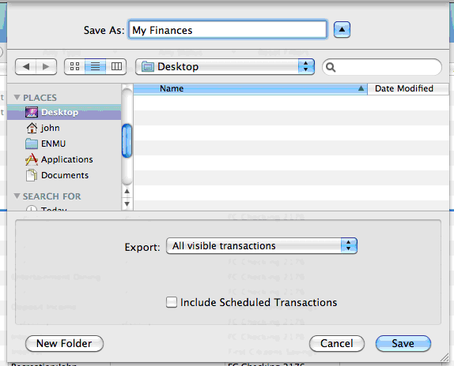
- Export all Visible Transactions (default), and deselect the option to Include Scheduled Transactions.
- Save the file
- Move this .csv file to your Windows machine.
- If you have not installed importQEM yet Install ImportQEM.
- Launch Quicken Windows and create a new file. Give it a unique name.
- Be sure to create at least one cash account. It is needed for the transfers to work right.
- Turning off the following options in Quicken Windows will help ensure that the import doesn’t change your data. You can turn them back on after the import if you like. Please note there is a bug in Quicken 2011 which makes it memorize payees and create renaming rules, even if you tell it to turn them off with the following settings, so some of your payees might get renamed anyways. But it also seems that in newer versions of Quicken the renaming rules are not applied to QIF imports.
Data entry and QuickFill
Complete fields using previous entries
Capitalize payee and categories
Automatically memorize new payees
Downloaded transactions
Automatically add downloaded transactions to register (VERY IMPORTANT!)
Apply renaming rules to downloaded transactions
Capitalize first letter only in downloaded payee names
Transfer Detection (Quicken 2011, and above)
Scan downloaded transactions for possible transfers
- Leave Quicken Windows running.
- Download and install ImportQEM (instructions here.)
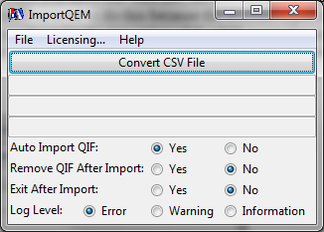
- Launch ImportQEM and open your .csv file using the Convert CSV File button. (Or simply drag the file onto the program’s icon (Desktop shortcut), if you do you will be taken directly to the Column Mapping dialog below). Pressing F1 will get you help for this window.
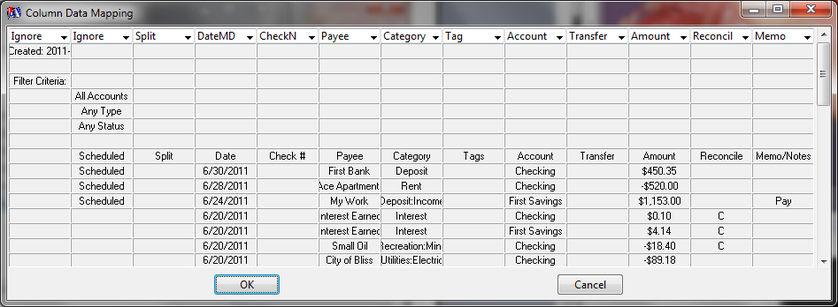
- Wait a few seconds, and a display will pop up listing the column mappings. They should already be correct, but verify to be sure. Pressing F1 will get you help for this window.
- Click OK.
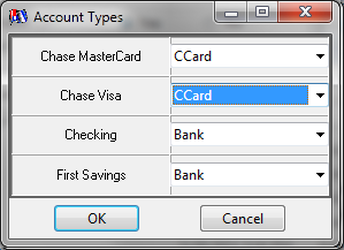
- This dialog will come up, press F1 to get help on this window:
- The choices are:
- Bank This type is used for Checking and Savings accounts.
- CCard This type is used for credit cards.
- Cash This type is used for cash accounts.
- Oth A This type is used for any other kind of asset account, like a house, car, …
- Oth L This type is used for any kind of liability or loan.
- Once you press OK the CSV file will be converted into a QIF file named Converted.QIF on your desktop, and if the Auto Import option is on it will import the QIF file into Quicken Windows. Make sure Quicken Windows if running before you press OK is the Auto Import option is on. While it is importing into Quicken Windows you will see a series of windows flash, don't touch them, let ImportQEM control them.
- Please note that if you are importing into an Quicken data file where all the accounts are already properly created you can leave the account type settings at their defaults, and it will see import correctly.
- Your data is now in Quicken Windows. Note: your balances will initially be incorrect. Click on each account and allow Quicken Windows to accept the transactions. Only after you have accepted transactions in ALL accounts will your balances be correct. Note currently on Quicken Windows 2018 the transactions are going right into the register and not allowing the user to accept them. This should still work for this process. You will just not be doing this step. Also the account balances in the Account bar might not be right until you restart Quicken.
- Verify the balances to your Quicken Essentials for Mac register. If they match, the process is complete.
Quicken Essentials to Quicken Mac 2007
Even though the QIF file produced by ImportQEM can also be used to import data into Quicken Mac, I believe that Quicken 2007 can now convert Quicken Essentials and Quicken for Mac 2015 and beyond files.
If you still want to do this you would use the same steps as outlined above except that you turn off the Auto Import QIF option in ImportQEM and you copy the Converted.QIF to your Mac and use the QIF import menus to import it.
